
1. Write one scene and generate your first page
Open Create, choose Build a comic book, and sign in with Google. Describe what happens on the first page. Give the characters a few visible traits, describe the action in order, and include any dialogue you want in the artwork.
We chose Clear Line and the 6 panels layout, then entered this scene:
Mira, a lighthouse keeper with curly black hair, a navy coat and a yellow scarf, finds an empty rowboat on the beach at sunrise. Inside is a small brass compass. Its needle points toward her lighthouse instead of north. Mira says, “That is not north.” She carries it up the spiral stairs, and the needle begins to glow beside the lamp. End with Mira discovering a tiny keyhole in the lamp base and saying, “What are you trying to show me?”
Click Generate page. The book is created with that first request. Wait for the page artwork to finish before continuing. The scene above gives the generator a character, setting, discovery and final question to spread across the six panels.
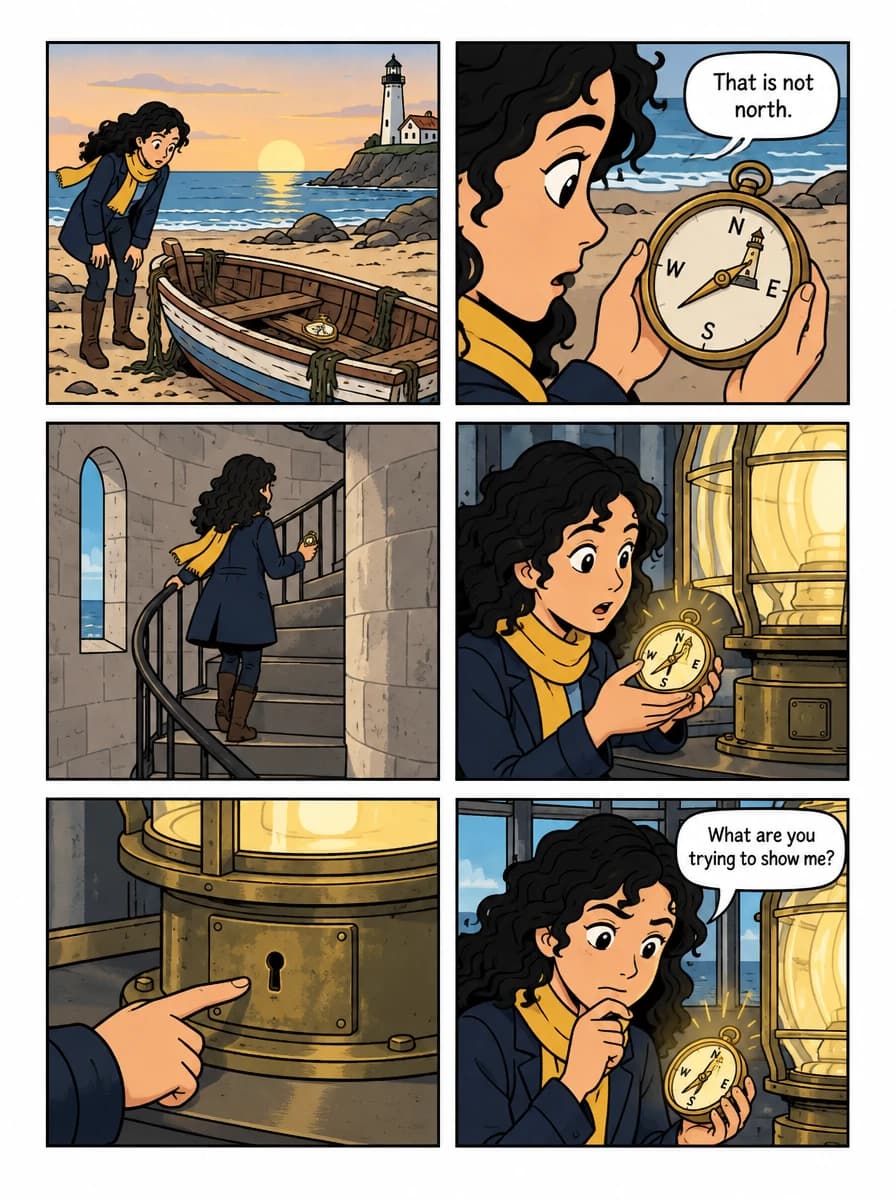
You can also choose four panels, three stacked panels, or a Story page. For a short AI comic strip, start with a single six-panel page and a scene with a clear beginning and ending.
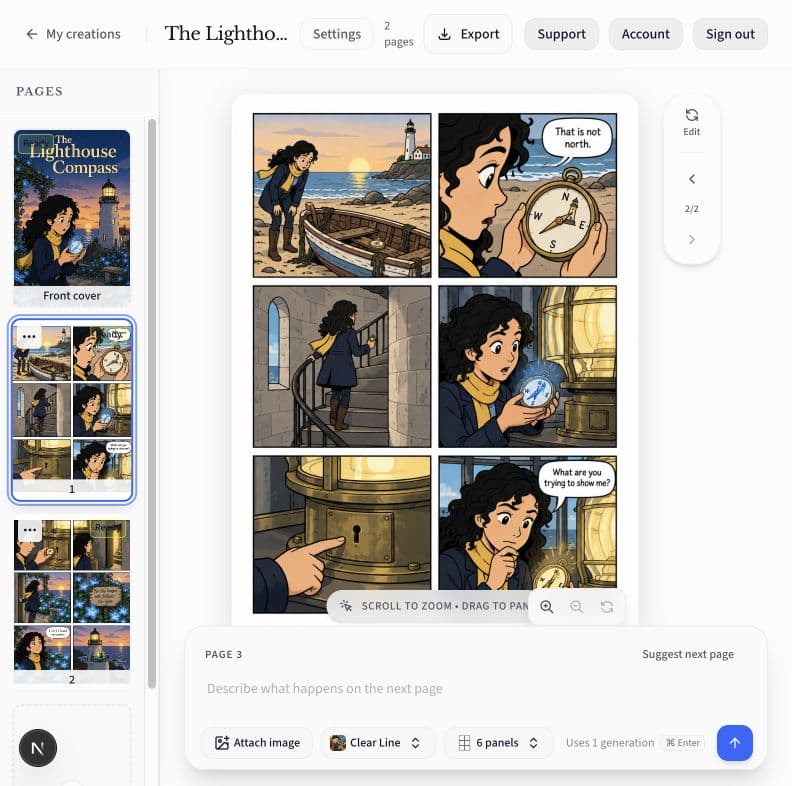
2. Continue the story on the next page
Use the next-page composer in the same book. Earlier pages provide visual and story context. Keep character names and important details consistent, and describe the next part of the story rather than repeating the first scene.
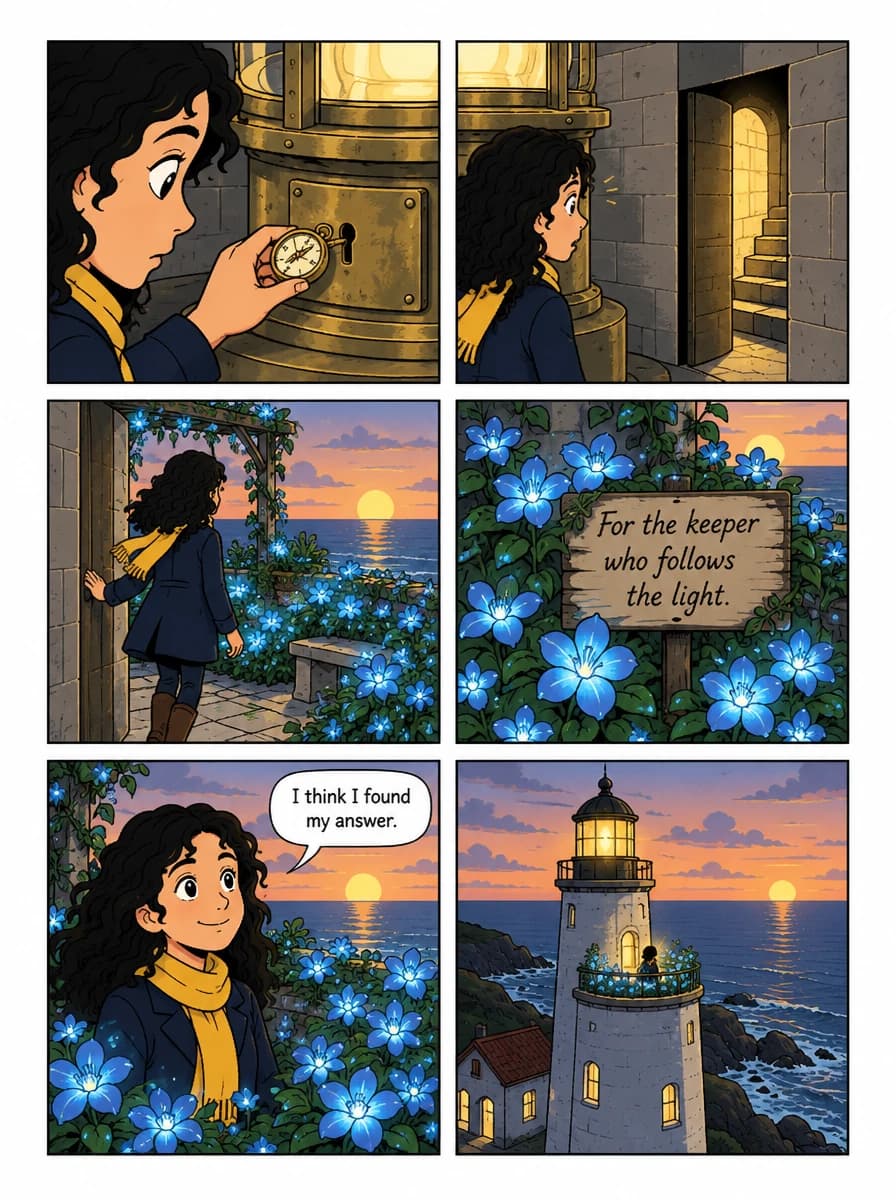
Continue with Mira in the lighthouse lamp room. She slides the brass compass into the tiny keyhole. A narrow beam of light reveals a hidden door in the wall. Mira opens it and finds a rooftop garden full of glowing blue flowers above the sea. A small wooden sign reads “For the keeper who follows the light.” Mira smiles and says, “I think I found my answer.” End with the lighthouse shining over the garden at dusk.
Generate the next page, then read the pages together. Check the character appearance, sequence of events and dialogue. If you need a starting point, Suggest next page creates an editable story draft before you generate artwork.
3. Change one panel
Select a completed page, open Edit, choose the single-panel edit, and select the panel you want to change. Describe the change and the details you want preserved. We used this request on the compass scene:
Change the compass needle glow to a clear blue light. Keep Mira, her yellow scarf, the brass compass, the dialogue and the rest of the panel unchanged.
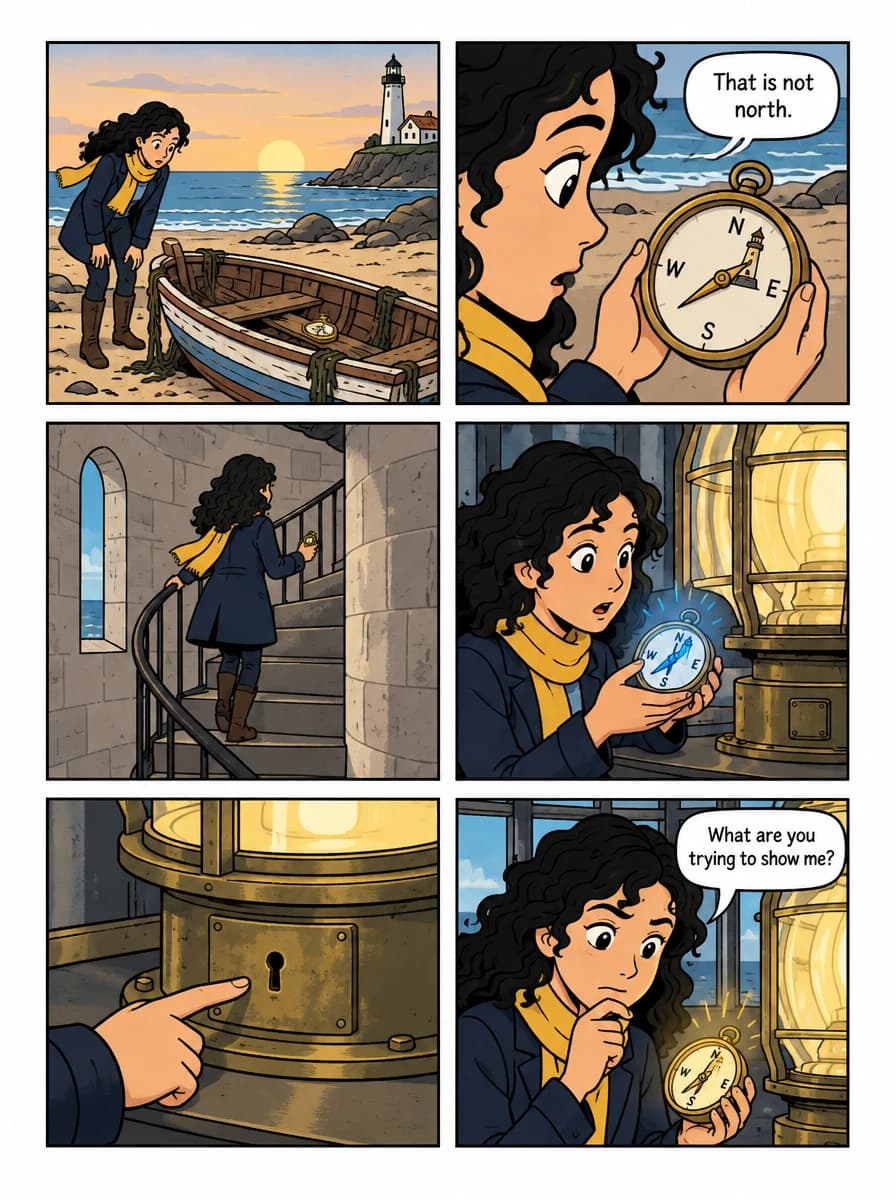
Review the result and browse the version controls to compare it with the original. Use a whole-page edit when the change affects the scene more broadly. Each completed generation or edit uses one generation.
4. Add a front cover
Choose Create front cover. Describe the cover scene and specify the title you want in the artwork. For this book, we asked for Mira holding the compass beside the lighthouse, with the title “The Lighthouse Compass.”
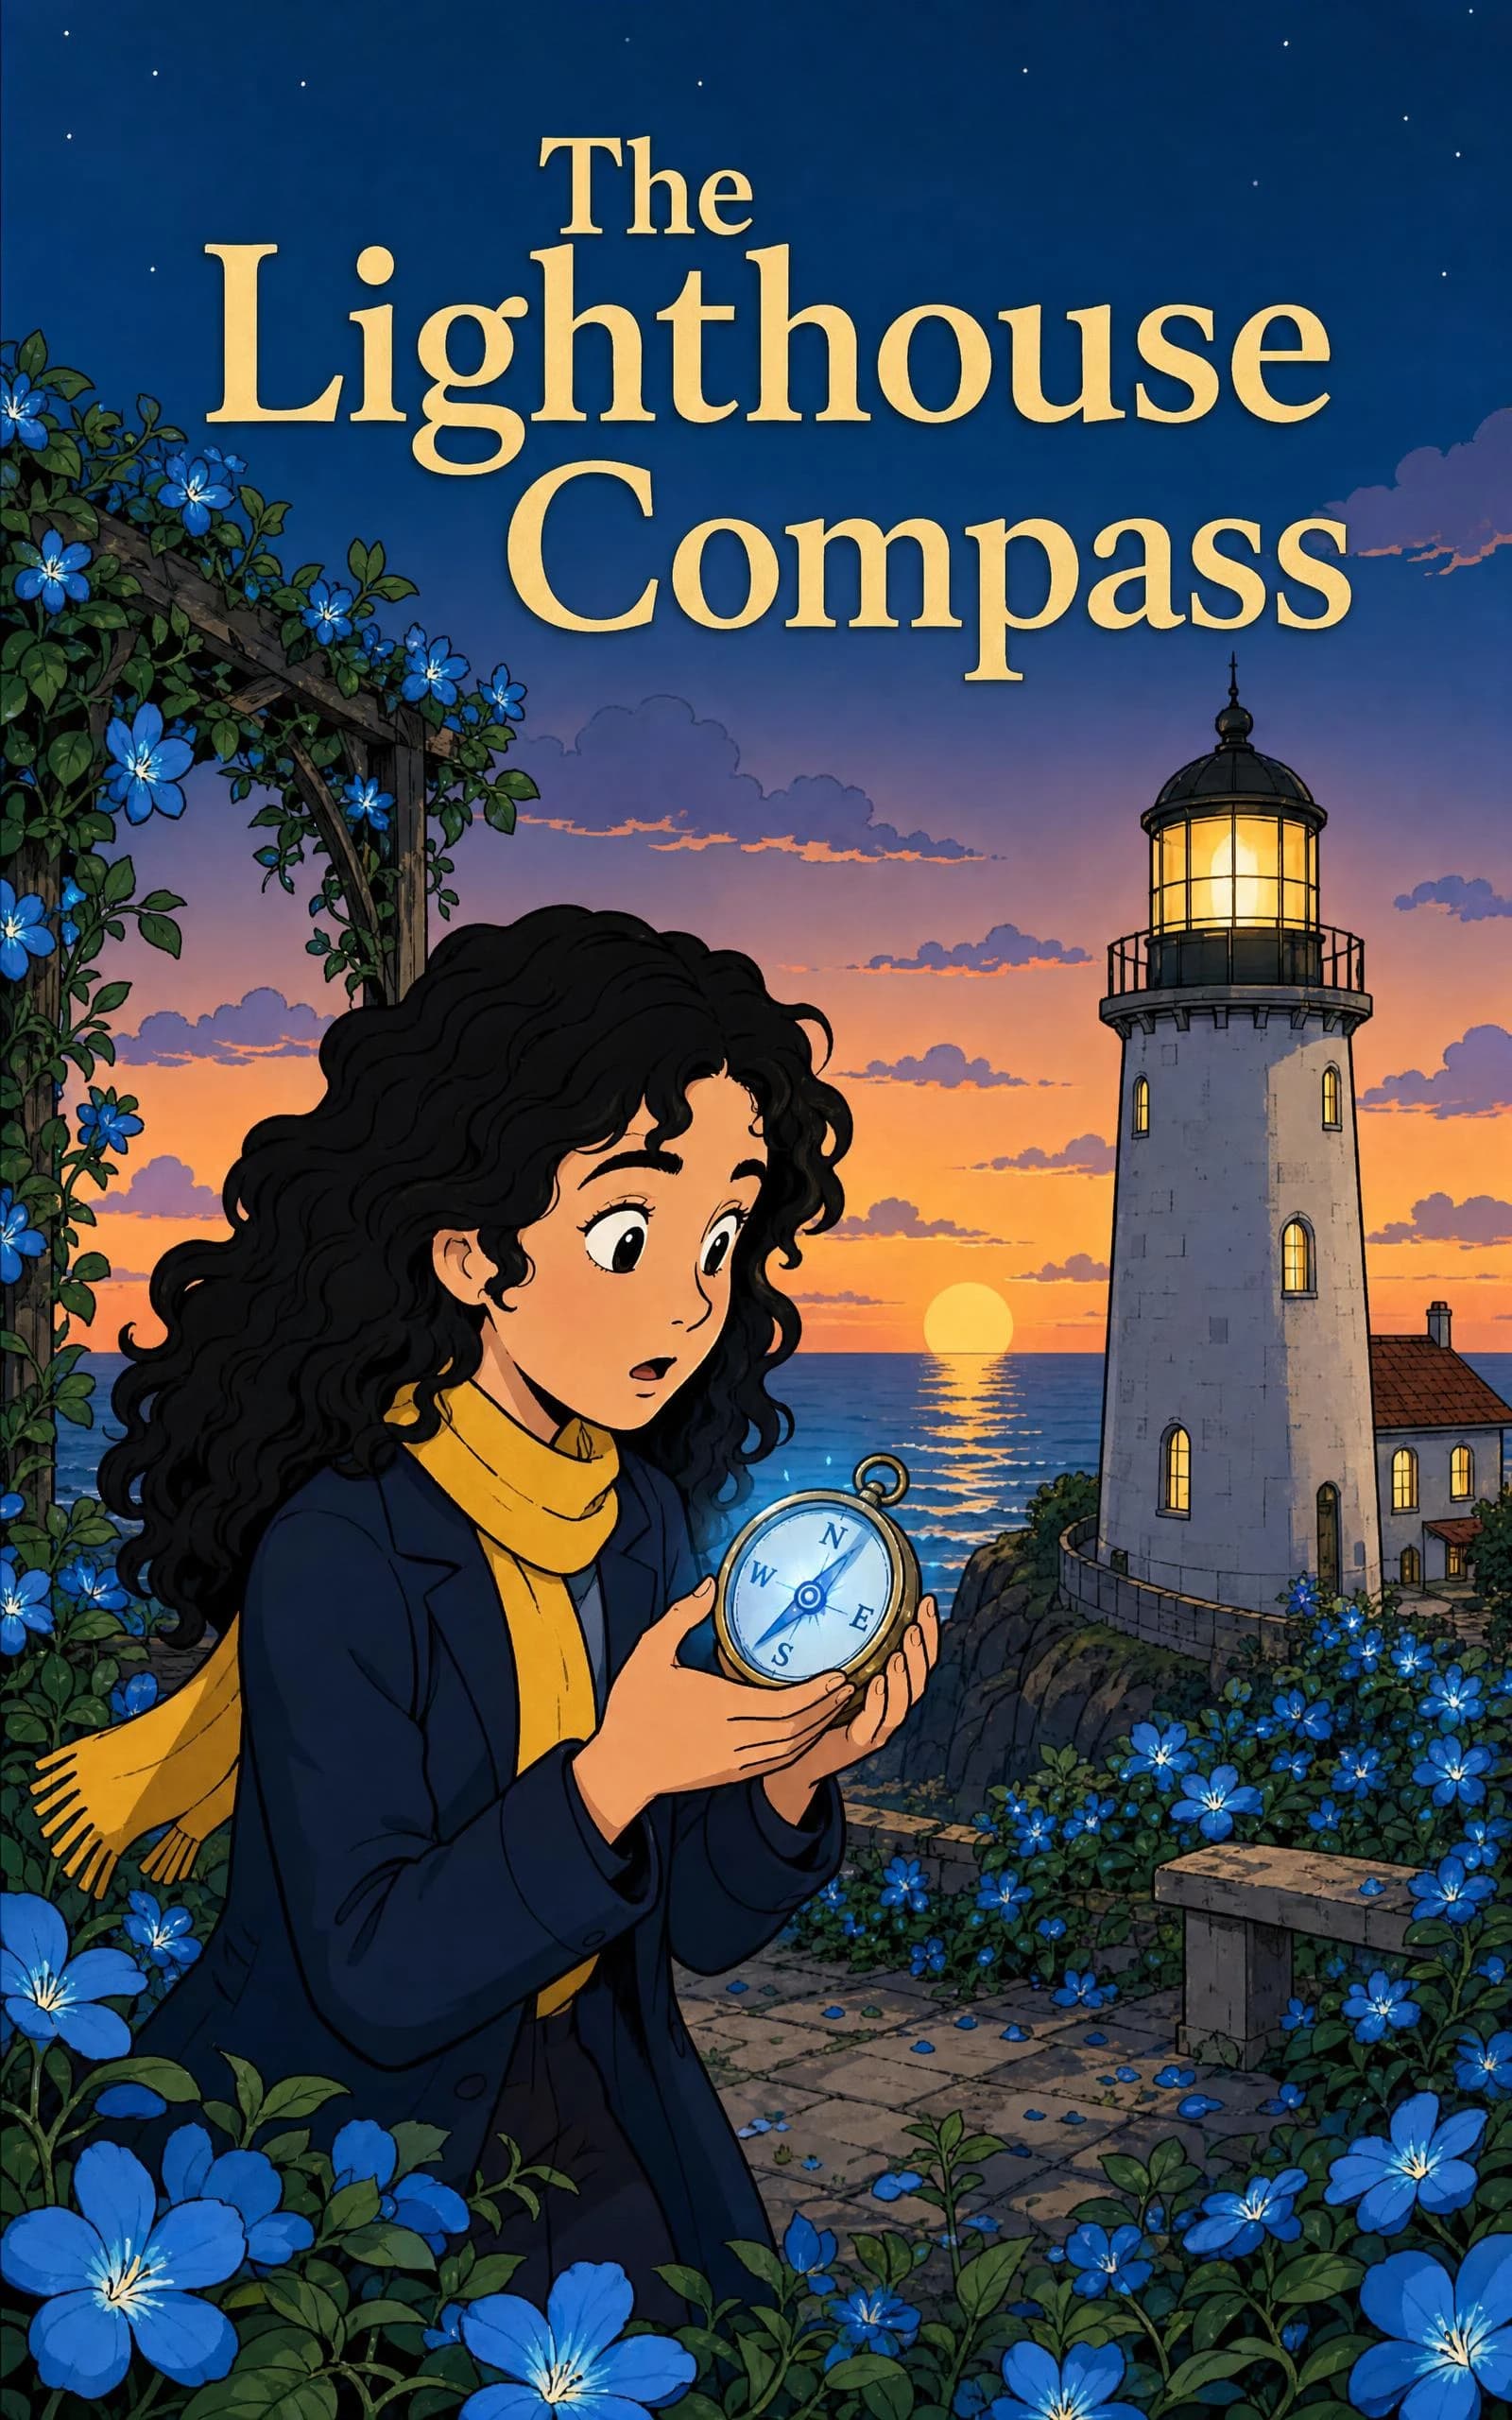
Review the title and artwork before exporting. A back cover is optional and can be created after the front cover.
5. Download your comic book
Open Export in the studio. Download the book images as a ZIP archive, choose a 5 × 8-inch Print PDF for personal printing, or export a fixed-layout Kindle EPUB. Check the active page and cover versions before exporting; those are the versions included in the book.
The demonstration below contains the front cover followed by the two comic pages.
Download the example comic PDFBefore you start
You get one lifetime free generation shared across comics and portraits. This example used two page generations, a panel edit and a front cover, so recreating the complete book takes more than the free allowance. Create Comic Pro costs US$19 per month for 30 generations; one-time packs are also available.
A text-to-comic generator gives you artwork to review and refine. Read the dialogue, check continuity, and choose the version you want before sharing the finished book.
Create your comic